4 Stretches to Alleviate Sciatica and Lower Back Pain
Let’s be honest, the self-quarantine we are all under can be a pain…literally. More specifically the lack of movement and sitting around for weeks can aggravate lower back pain and sciatica nerve pain. People with sciatica can see a worsening of the symptom and many will develop it during this time.
Exercise and stretching can be useful in helping prevent or alleviating sciatica and manage lower back pain while we are sequestered at home during this pandemic. It is important to enter into the exercises slowly and carefully to eliminate the risk of further injury while you are home.
It is important to consult with a physician if you are experiencing severe back pain.
Follow these simple instructions to perform these stretches for sciatica and lower back pain relief:

- Begin by lying on your back, with your legs and arms extended.
- As you exhale, draw both of your knees to your chest. Clasp your hands around them. If it is possible for you, wrap your forearms over your shins and clasp each elbow with the opposite hand.
- Keep your back flat on the mat. Release your shoulder blades down toward your waist. Broaden across your collar bones.
- Draw your tailbone and sacrum down toward the mat, lengthening your spine even more. *If it is comfortable for you to do so, softly rock backward and forward or side-to-side for a gentle spinal massage.
- Tuck your chin slightly and gaze down the center line of your body.
- Hold for up to one minute. Keep your breath smooth and even.
- With an exhalation, release and extend both legs along the floor and rest. Repeat up to six times.
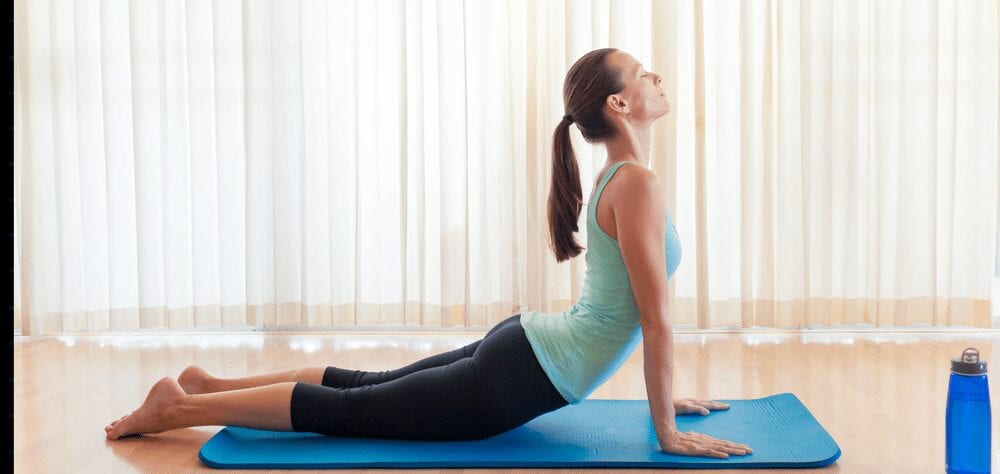
Cobra

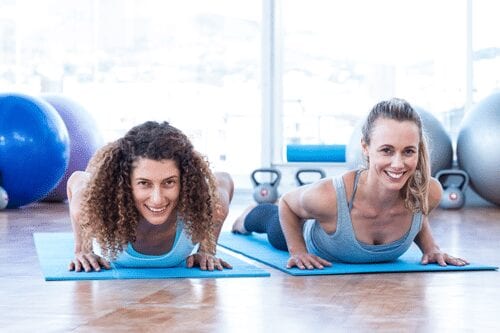
Modified Cobra

Modified Cobra – Lie down on your belly. Place your hands on the floor by the outer edges of your mat. Line up your palms with your chest. Inhale and lengthen your chest forward and lift it up.
- Lie flat on your stomach with your toes pointed and the soles of your feet facing upward.
- Plant your palms on the mat, below and slightly outside your shoulders. Spread your fingers wide. Your middle finger should point straight forward towards the front of the mat. Bring your arms in, so that they brush your sides.
- Engage your legs and stomach by flexing the abdominal and quadricep muscles. Engaging these muscles will protect your lower back by preventing compression. Press your hips and the tops of your feet into the mat.
- Slowly tilt your head backwards, so that the chin points forward and the back of the neck is gently compressed.
- nhale. Mimick the movement of the head with the rest of the body by slowly straightening your arms. The lift should come primarily from your back muscles and only secondarily from your arm muscles.
- Scoop your tailbone towards your navel. This pelvic tilt will also protect your lower back in cobra pose. Keep your hips planted firmly on the mat and raise your navel no more than three inches off the ground.
- Roll your shoulders slightly back and down, to firm them against your back. Bend as evenly as possible through your lower, middle, and upper back.
- Breath and hold the pose.
- Exhale. Leave the pose incrementally. First, bend the arms slowly backwards. Lower the navel to the mat, then the chest, then the shoulders, and, lastly, the forehead.
Seated Spinal Twist

Modified Seated Spinal Twist

- Begin by lying on your back, with your legs and arms extended.Sit upright on your mat with your legs extended in front of you and your hands resting on your thighs.
- Bend your right knee, then cross your right leg over and place your foot next to your left thigh. You should feel as though you’re sitting in a tight half cross-legged position.
- Bend your left knee and position your left ankle next to your right glute. Your right foot should stay planted on the floor. Square your hips so they remain even.
- Reach your right arm behind you and place your fingertips on the floor, gently twisting your body to the right. Raise your left arm upward.
- Reach your right arm behind you and place your fingertips on the floor, gently twisting your body to the right. Raise your left arm upward.
Modified Seated Spinal Twist
If you find bending your supporting leg too challenging, leave both legs on the floor and gently rotate your torso.
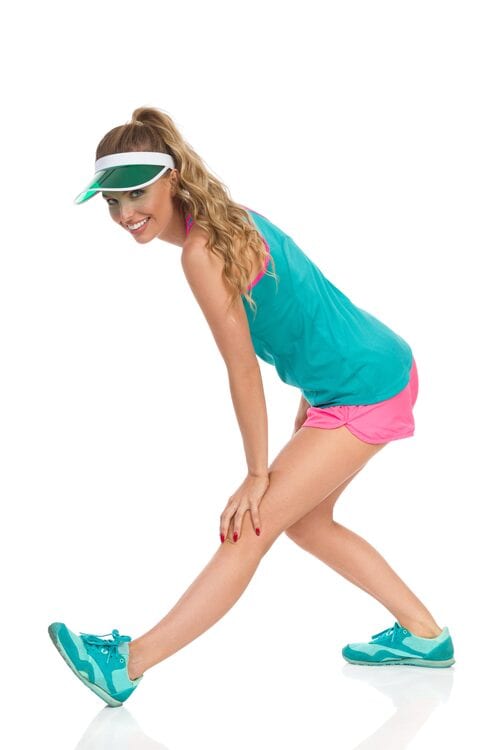
Standing Hamstring Stretch

- Stand tall with your left foot a few inches in front of your right foot and your left toes lifted.
- Bend your right knee slightly and pull your abdominals gently inward.
- Lean forward from your hips, and rest both palms on top of your right thigh for balance and support.
- Keep your shoulders down and relaxed; don’t round your lower back. You should feel a mild pull gradually spread through the back of your leg.
- Repeat the stretch with your right leg forward.
If any of these exercises make the sciatica worse, stop immediately. It is normal to feel stretching during these movements, however it is not normal for the sciatic pain to increase.
Joseph Spine Institute is fully operational and is now offering tele-health services during this time if your pain is severe.
